Getting Started
Installation
The module can be downloaded using python pip.
Command:
pip install django-admin-kit
Configuration
The app name
admin_kitshould be put at the top of installed apps in djangosettingsfile.# settings.py INSTALLED_APPS = [ 'admin_kit', 'django.contrib.admin', 'django.contrib.auth', ... ]This is because, Admin Kit overrides Django change_form template. Then register the admin_kit app in root
urlsfile with nameadmin_kit# urls.py from django.conf.urls import url import admin_kit urlpatterns = [ ... url(r'^admin_kit/', admin_kit.site.urls, name="admin_kit"), ]Start the server and hit
/admin_kit/pingurl response. You will get aPONGresponse if configured correctly.This ping url is enabled only in
DEBUGMode
Features
We will have a walk through of different features that Admin Kit provides.
Duplicate Button
This is a default feature that is added right after successfull configuration of the app.

This button is similar to
Add Anotherbutton, but it initializes the fields with previously filled data. It is also compatible with django-nested-adminTo disable this feature set
KIT_DISABLE_DUPLICATE = Truein settings file.Note
The duplicate button is only on Inline Admin Models like
Staked Inline,Tabular Inlineornested_admin fields.
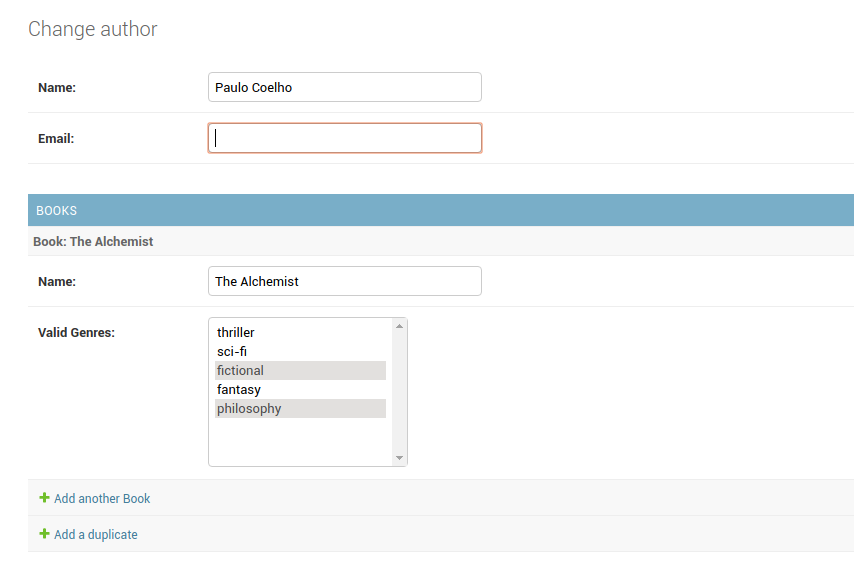
Multi Select Field
Admin Kit provides Multi Select field where you can specify choices. It uses
admin_kit.models.MultiSelectField.In models.py file
# models.py

from admin_kit.models import MultiSelectField

class Book(models.Model):
    ...
    GENRES = (
        ('thriller', 'thriller'),
        ('sci-fi', 'sci-fi'),
        ('fictional', 'fictional'),
        ('fantasy', 'fantasy'),
        ('philosophy', 'philosophy')
    )
    ...

    genres = MultiSelectField(verbose_name='Valid Genres', choices=GENRES)
In Admin Panel
Ajax Binding
The core feature of Admin-Kit is the support for easier ajax behaviour. It binds the form-field with user defined view through ajax.
Setting up this behaviour is 2 step process.
- Step 1: API Creation
Create an
ajax.pyfile in the app. And create a class that inheritsadmin_kit.ajax.Ajaxand hasrun(self, request)method. This method is executed, which acts as an API.And register this class using
admin_kit.site.registermethod. The first argument is the key through which the model links to class and second is the class itself.For our example lets fill the choices from an API. Create an
ajax.pywith below code.import admin_kit class GenresAjax(admin_kit.ajax.Ajax): def run(self, request): GENRES = ( ('thriller', 'thriller'), ('sci-fi', 'sci-fi'), ('fictional', 'fictional'), ('fantasy', 'fantasy'), ('philosophy', 'philosophy') ) return GENRES admin_kit.site.register('genres', GenresAjax)Internally, the return type of
runmethod is json formatted and acts as an API.You can get the response by hitting
admin_kit/ajax/genres. Heregenresin the url is same as thekeyname used for registering in ajax.py file.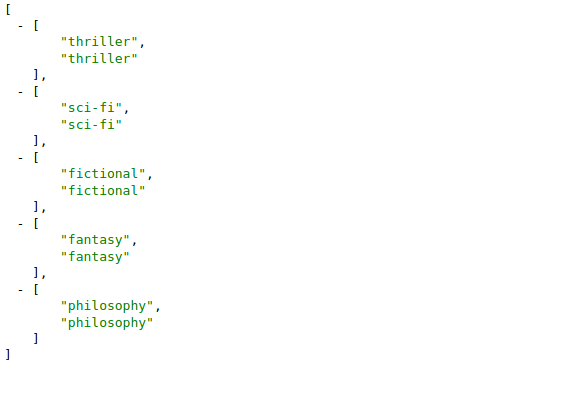
The data was rendered by Chrome Extension JSON View
Step 2: Model Binding
In our
models.pyfile modifygenresfield with below codegenres = MultiSelectField(verbose_name='Valid Genres', ajax_source='genres')And thats it!! you will get the same behaviour, but now the choices are filled from your function. For every change in value, it calls
runmethod from your ajax class. Thus you can process the return based on the request.You can also access the user selected values and target the values to a specific field. To learn them please go through our documentation
Gotchas
- While using ajax behaviour make sure the model field is from
admin_kit.fields. If you try to use ajax attributes likeajax_sourceorkit_configin fields fromdjango.models, you will get an error- As the project is new, currently it only has MultiSelectField. In further releases, newer fields will be integrated.